Merrow vs. Satin Stitch Edges: Choosing the Right Border for Your Patch Shape
When designing a custom patch, the border finish is just as important as the artwork itself. The edge defines the shape, reinforces durability, and impacts how clean and professional the final patch looks.
Two of the most common edge finishes, Merrow edge and Satin stitch edge, each have strengths and limitations. Understanding what shapes can and can’t be produced with a Merrow edge will help you avoid design issues and choose the best alternative when needed.
Choosing the Right Edge from the Start
Selecting the right border isn’t just a production detail, it’s a design decision that affects quality, longevity, and appearance.
|
Simple, rounded designs → Merrow edge
Detailed, sharp, or complex shapes → Satin stitch edge
|
 |
By matching your patch shape to the appropriate edge finish early in the design process, you’ll get a better-looking patch and avoid unnecessary revisions.
What Is a Merrow Edge?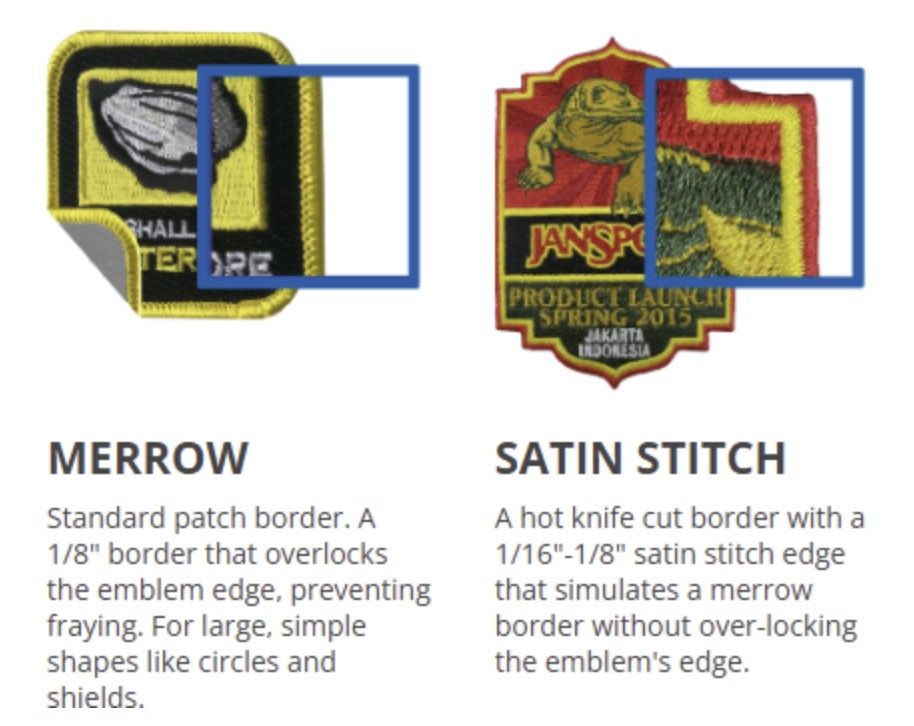
A Merrow edge is a traditional overlocked border, typically about 1/8” thick, stitched continuously around the perimeter of a patch. It’s popular for its durability and classic embroidered look.
Merrow edge works best for:
- Simple, continuous outlines
- Smooth curves
- Large, rounded shapes like circles, ovals, and shields
When the shape is straightforward, a Merrow edge delivers a clean, uniform finish that resists fraying and holds up well over time.
When a Merrow Edge Doesn’t Work
Despite its popularity, a Merrow edge isn’t suitable for every design. Certain shapes and edge details simply can’t be stitched cleanly using this method.
|
A Merrow edge cannot be used effectively when a design includes:
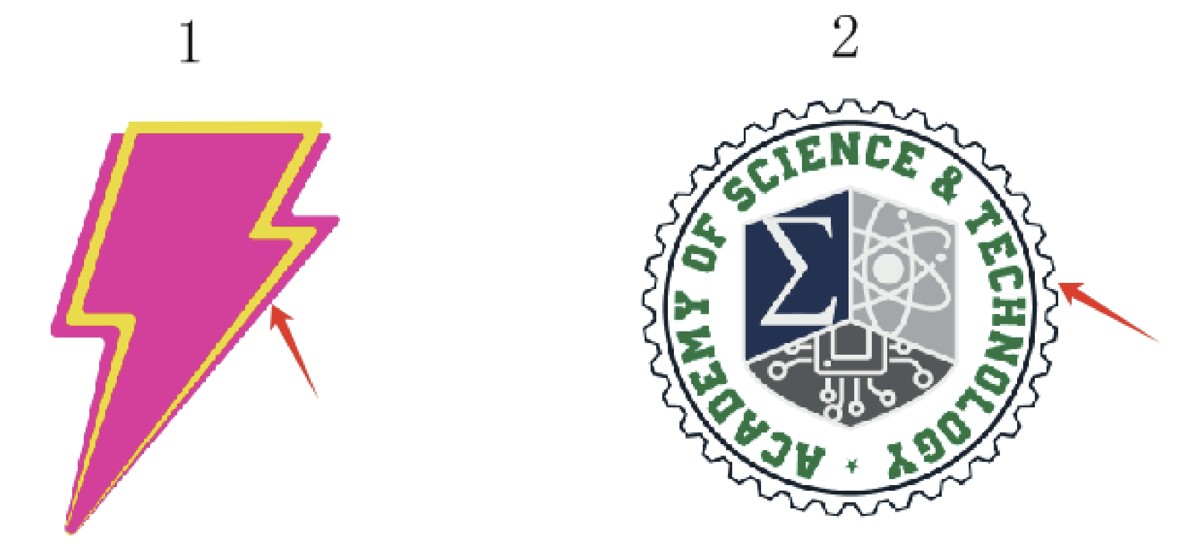
- Inconsistent edge thickness or multiple edge colors - see image #1
- Jagged or uneven outlines - see image #2
|
 |
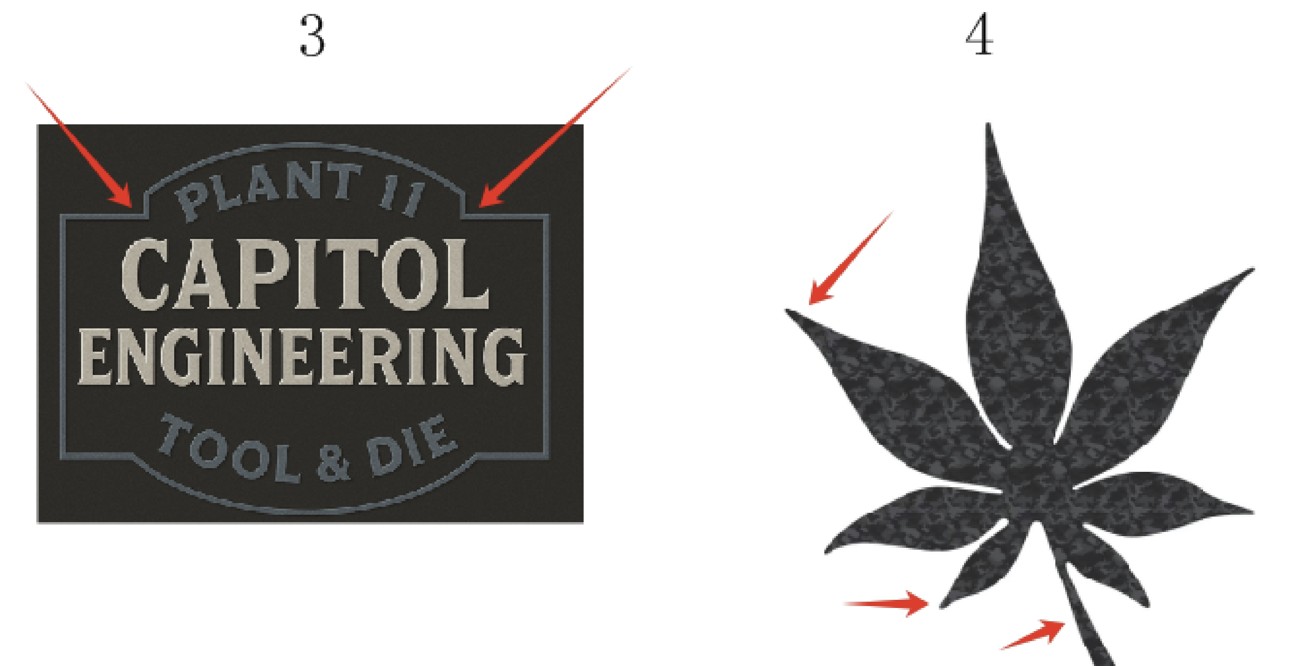
- Concave corners or tight inward angles (less than 130°) - see image #3
- Sharp points, slender tips, or extreme convex angles (less than 45°) - see image #4
|
|
These characteristics interrupt the continuous stitching motion required for Merrowing. The result would be uneven edges, distorted shapes, or compromised quality, which is why experienced manufacturers avoid using Merrow in these cases.
Satin Stitch Edge: The Best Alternative for Complex Shapes
When a Merrow edge isn’t an option, a Satin stitch edge is often the ideal solution.
A satin stitch edge is created using a dense, satin embroidery stitch that follows the exact contour of the patch. This method offers significantly more flexibility, making it perfect for detailed or intricate outlines.
Satin stitch edges are ideal for:
- Complex or irregular shapes
- Sharp corners and pointed elements
- Concave and convex curves
- Designs requiring precise edge control
Because the stitch is digitized rather than overlocked, it allows for much greater accuracy along difficult edges while still delivering a polished, embroidered finish.
Satin Stitch Edge Limitations to Keep in Mind
While satin stitch edge is more flexible, it does have its own technical requirements:
- Cut-out areas must be at least 2mm wide to maintain structure - see image #1, the cut-out area is less than 2mm
- Satin stitch edges should be no thinner than 2mm for durability - see image #2, the stitch thickness is less than 2mm
|
 |
Designs that fall below these thresholds may not hold their shape properly during production.
If you’re ever unsure which edge is right for your artwork, our team is happy to review your design and recommend the best option to ensure the final patch looks exactly as intended.